The 303rd article of the Dongle Reorganization Airdrop: Understand the key interaction steps of the Particle Airdrop Alliance in one article, earn an extra 50 points for each transaction (one fish, multiple eats)
Two weeks ago, the most promising project in chain abstraction, Particle Wallet announced the launch of the Co-Testnet Alliance, indicating that there will be many benefits from the Particle airdrop.
https://x.com/JiamigouCn/status/1809134041549111497
The Co-Testnet Alliance went live yesterday, with the first phase collaborating with the largest projects in the industry (such as Berachain, Sei, Arbitrum, and other tier-one blockchains).
With the launch of the alliance, the previous steps for obtaining Particle will also change. So today, we will start from scratch and tackle the most challenging and impressive airdrop project in the alliance: Berachain, and see how to interact with it.
1. Before the Tutorial
(1) Register for a Particle Network Alliance Account
- Relevant link: https://pioneer.particle.network?inviteCode=A58DD1
- Referral code: A58DD1
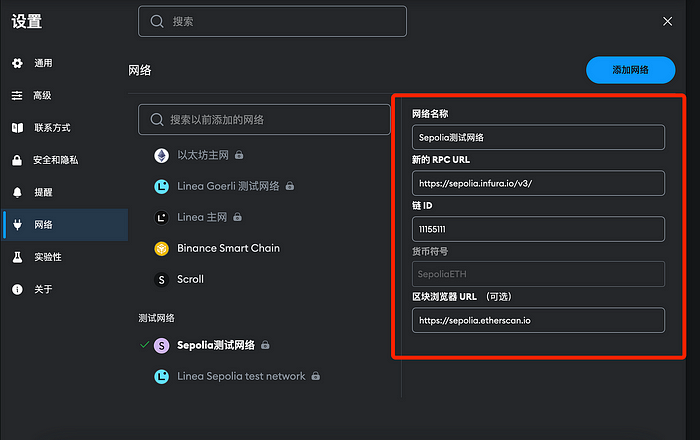
(2) Add the Sepolia Test Network to Your Wallet (Already added, can be ignored)
- Network Name: Sepolia Test Network
- RPC URL: https://sepolia.infura.io/v3/
- Chain ID: 11155111
- Currency Symbol: SepoliaETH
- Block Explorer URL (optional): https://sepolia.etherscan.io
(3) Claim ETH Test Tokens
- Claim 0.5 ETH test tokens from Infura
Link: https://faucetlink.to (Faucet aggregation site)
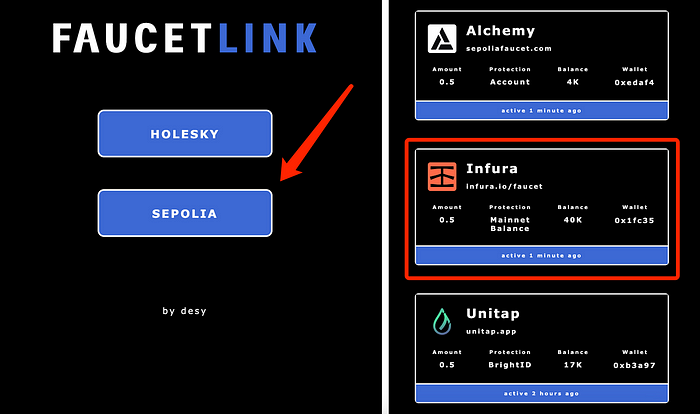
If you have tried many methods and still can't get water, you can buy directly:
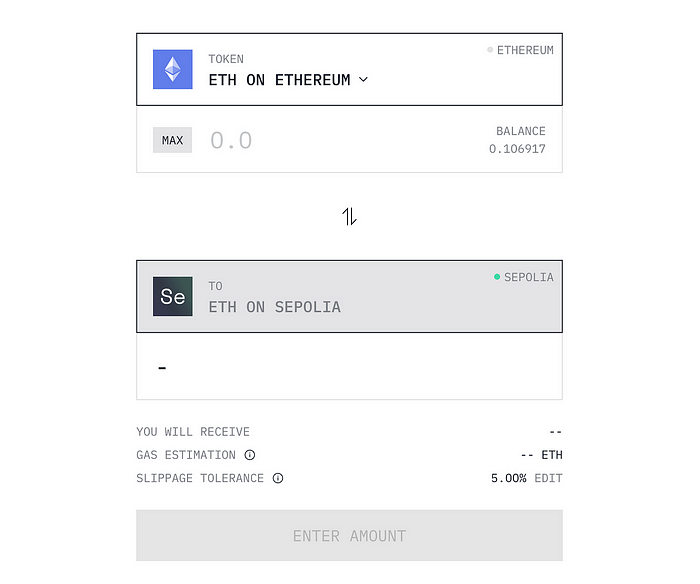
https://testnetbridge.com/sepolia
You don't necessarily have to claim ETH test tokens; other test tokens are also acceptable. Faucet collection: https://link.medium.com/5XztnvgqkLb
2. Specific Operation Guide
After obtaining water, go to the official website: https://pioneer.particle.network?inviteCode=A58DD1, invitation code: A58DD1
- Click on POINS to enter the points tasks

(1) Complete Task 2: Transfer ETH Sepolia to Particle Test Network
(You can use other test tokens, such as BNB, MATIC, etc., not just ETH)
Scroll down the interface to find the task. The official order is TASK 1--4, but we will not follow the official order. The quick sequence is as follows:
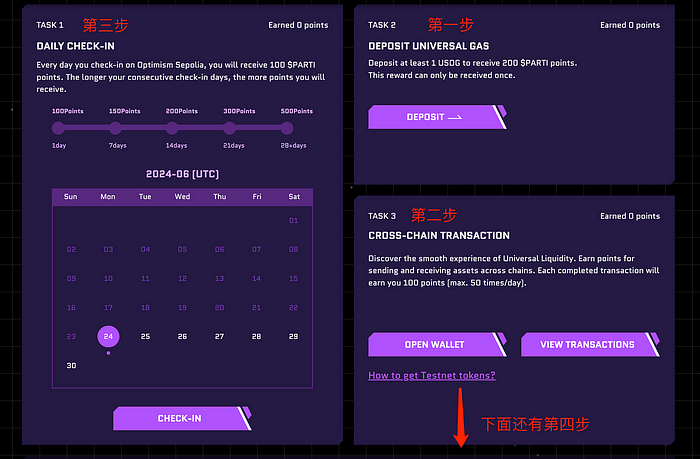
- Select chain (this tutorial uses ETH Sepolia, but you can use others)
- Transfer ETH Sepolia to Particle Test Network
- Click DEPOSIT
- Click DEPOSIT UNIVERSAL GAS;
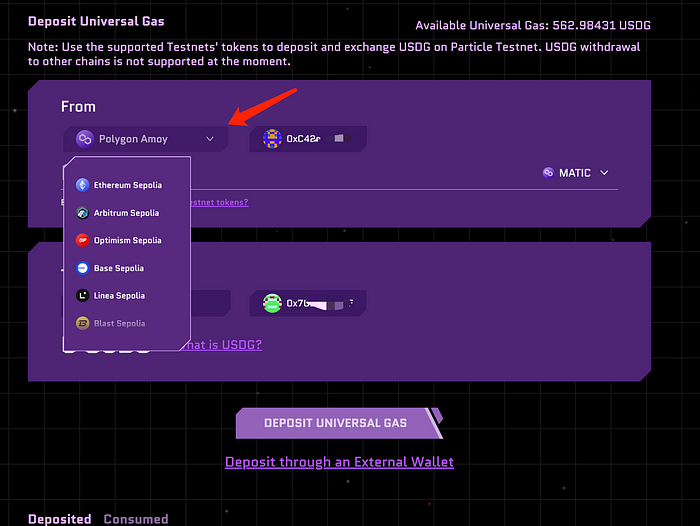 Note: The operation here is to convert native test tokens from other chains into the universal gas on the Particle Pioneer platform --- USDG, which is used for gas fee burning in the interactions below. Testnet tokens are hard to obtain, so please cherish them and do not convert all testnet tokens into USDG at this step.
(2) Complete Task 3: Complete Berachain Cross-Chain Interaction (Key Point)
For each transaction completed in Task 3, you can earn 100 points (up to 50 times a day), and using Berachain bArtio or Sei Testnet for settlement earns an additional 50 points per transaction.
Taking Berachain as an example, the interaction steps are as follows:
Step 1: Click OPEN WALLET to open the wallet

Step 2: Send USDG to Berachain bArtio or Sei Testnet
- Copy the Particle wallet address
- Click Send
- Select USDG
- Choose Berachain bArtio or Sei Testnet
- Enter the amount
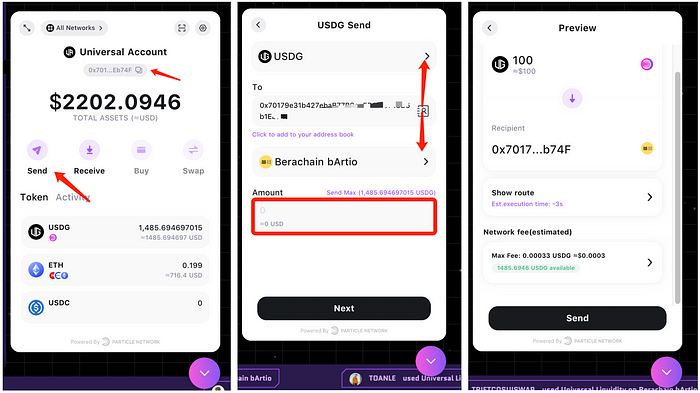
After completion, you can see how many transactions you have interacted with on the main page:

Here, we do not need to use $Bera as the transaction fee; we only use the universal gas ------ USDG to cover all transaction fees, which embodies the concept of "one account, one balance, any blockchain" in universal accounts, allowing us to not even realize we are cross-chain.
(3) Complete Task 1: Daily Check-In
(1) Before Check-In
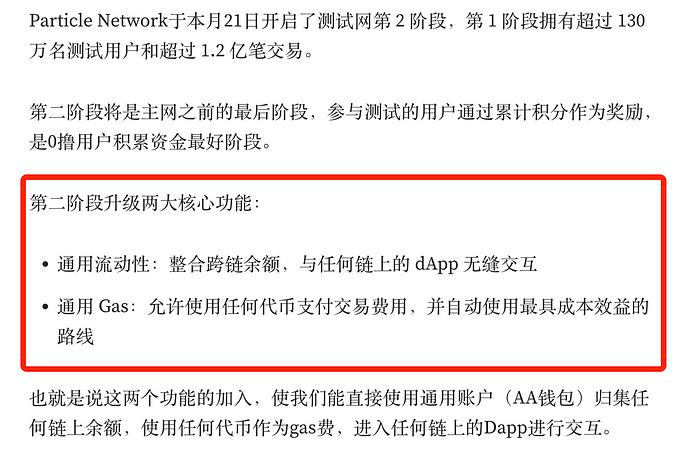
The daily check-in still uses Optimism Sepolia. Many people think about obtaining test tokens on Optimism Sepolia, which completely misses the advantage of Particle's "universal account."
Particle has completed internal cross-chain functionality; you only need one account balance to cross to various chains internally.
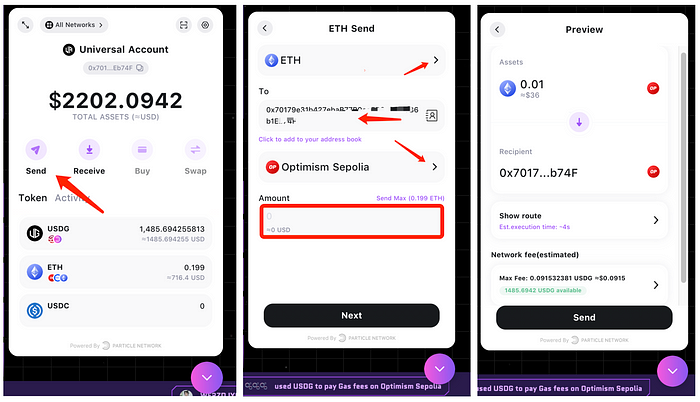
(2) Cross ETH to Optimism Sepolia (Count as Task 3 Transaction Points)
Step 1: Open Particle Wallet
- Copy the Particle wallet address
- Click Send
- Select ETH
- Paste the address
- Choose Optimism Sepolia
- Enter the amount
- Click Send
- Done
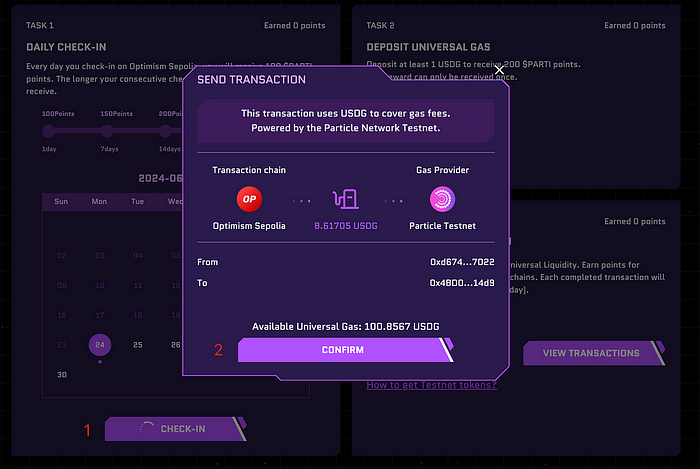
(3) Check-In
- Click CHECK-IN
- Click CONFIRM
(4) Purchase NFT
Scroll down the page to find TASK 4
- Click PURCHASE NFT

- Click PURCHASE

- Select token
- Click NFT
- Pay with USDG (unlike previous phases, the assets consumed here are from Berachain and Sei)

- Confirm with MetaMask
- Purchase successful
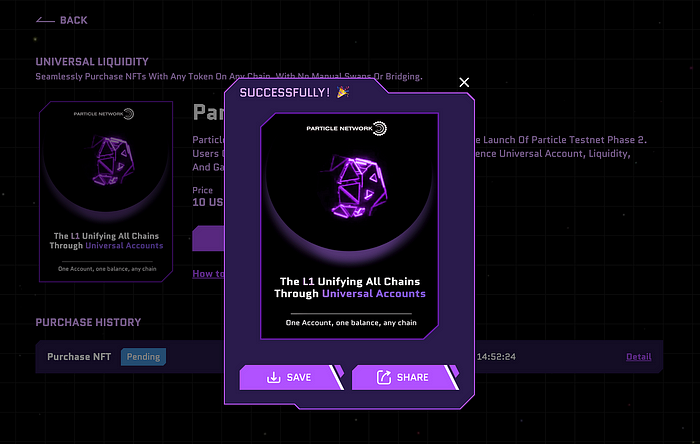
Purchasing an NFT earns 100 points, with a daily limit of 10 completions.
More points mean more opportunities to earn more $PARTI tokens, so don't stop; fill up your points every day. It is reported that holding $ALY and CAPYBARA NFTs will yield more rewards.
That concludes today's tutorial. From the overall experience of the tutorial, Particle fully aligns with the concept of "one account, one balance, any blockchain," which is the fundamental concept of chain abstraction.
WEB3 EVM and non-EVM are not interoperable, and users have to download various wallets, which undoubtedly leads to the gradual fragmentation of user assets, representing a waste. If users can use one wallet, one account, and one balance to act as gas fees, while being compatible with EVM/non-EVM/BTC chains, such applications can fully meet various future needs while lowering the threshold for Web2 users to enter Web3. It is only a matter of time before such projects break out.
Particle Network is addressing these issues. From the six-month testnet experience, we can sense the demand landscape after the mainnet launch, so as early users, we should try to obtain its free quota to prepare for future monetization.


