A Comprehensive Guide to the Intent-Based DeFi Infrastructure Aperture dApp
Translation: Aperture Tutorial
Editor's Note: Liquidity has always been an important component of the crypto world, and many crypto projects focus on liquidity infrastructure. Aperture Finance is a DeFi platform based on intent architecture that combines AI with Intent to build a new type of chatbot supported by underlying Intent infrastructure. This chatbot will enable users to "declare their goals" in natural language and leverage a solver network for better execution and pricing. Since the public beta announcement in October 2023, the project has attracted a large number of users and has completed over $950 million in total liquidity trades.
Here are the detailed steps for the Swap and adding liquidity tutorial on Aperture:
1. How to Swap Token on Aperture dApp
The steps to Swap Token on the Aperture dApp are very simple, allowing users to swap one cryptocurrency for another. Below is a guide to swapping tokens that can help users complete the swap seamlessly:
- Go to the Aperture dApp (https://app.aperture.finance/), connect your wallet, and select the appropriate chain.
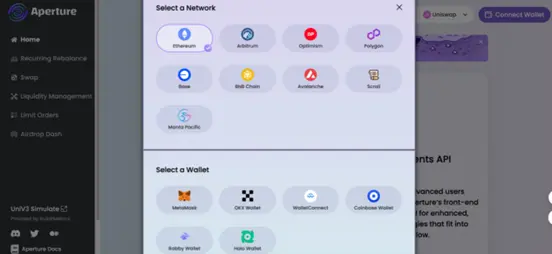
Click on the "Swap" option on the interface.
Search and select the token the user wishes to trade; you can enter the token name or the token contract address.
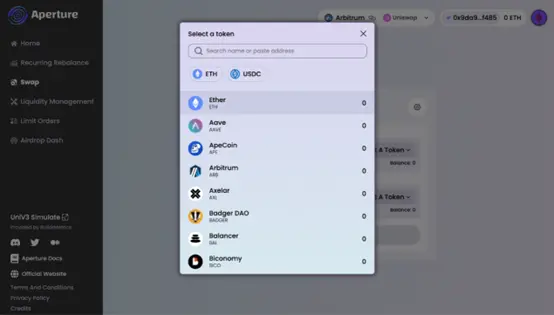
Click to confirm the token to be swapped.
Enter the amount of tokens to be swapped. If you want to use all available tokens in your wallet, click the "Max" option, which represents the total amount of tokens available for trading. Click "Swap" to confirm.
The interface will display specific information about the swap; carefully review all information, including the tokens and amounts being swapped. When ready, click "Swap."
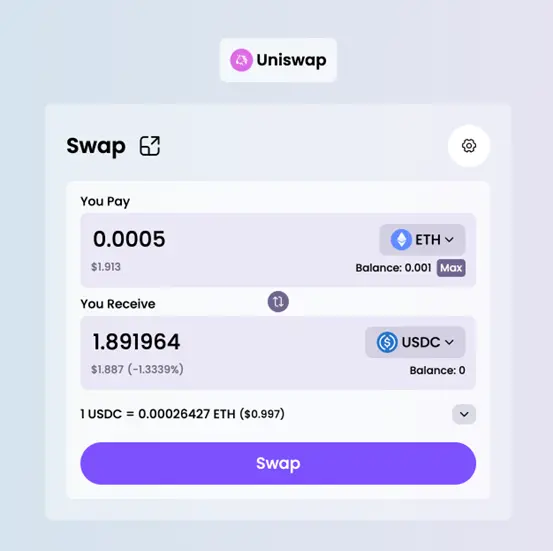
If this is your first time using Uniswap and Aperture to swap tokens, you will need to approve the token permissions in your wallet and pay some network gas fees before proceeding with the trade.
Confirm the swap in your wallet.
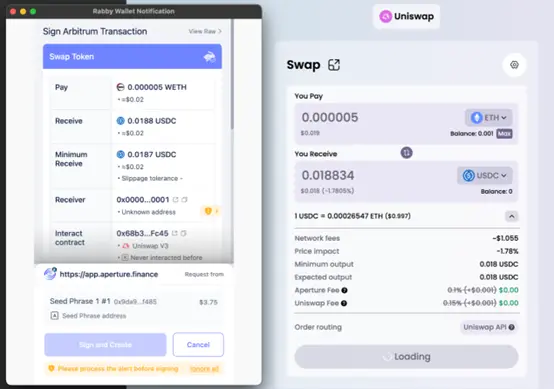
After confirmation, the transaction will be submitted to the blockchain and will be in a pending state.
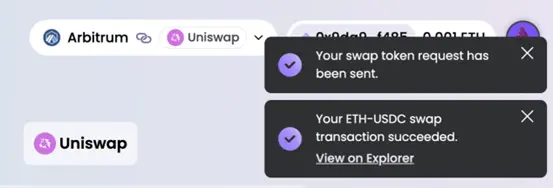
When the transaction is successfully completed, the user will see "Your swap transaction was successful." You can view the swap details on the blockchain explorer by selecting "View on Explorer."
2. How to Use Aperture to Add Liquidity to Uniswap V3
Aperture allows users to concentrate liquidity on Uniswap V3 within custom price ranges and fee tiers.
- Click to enter the Aperture dApp and switch to the "Liquidity Management" section. Click "New Position" to start adding liquidity.
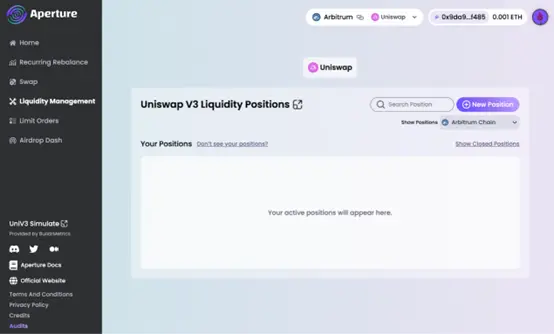
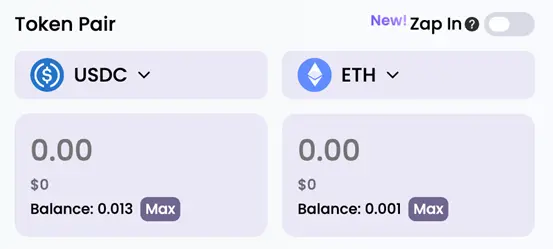
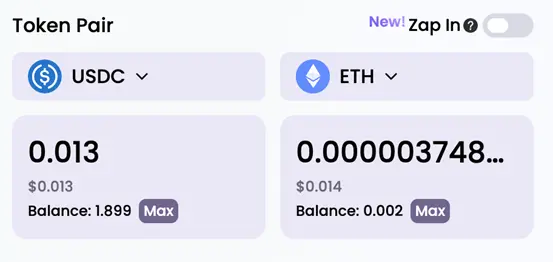
- Select the ERC-20 Token pair you wish to add liquidity to. First, choose one token, then continue to select the corresponding token. If the user wishes to use only one of the tokens to add liquidity, they can choose "Zap In." Aperture will execute the required token ratio for the swap.
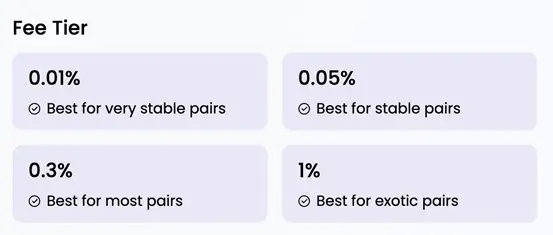
- Determine the fee tier suitable for the user's liquidity pair; options include 0.01%, 0.05%, 0.3%, and 1%. The availability of liquidity pools for the selected fee tier varies, and the user's position will either join an existing pool or create a new one based on their choice.
- Specify the amount of tokens the user wishes to deposit into the pool. The "Max" option allows for quick allocation of any available tokens from the wallet.
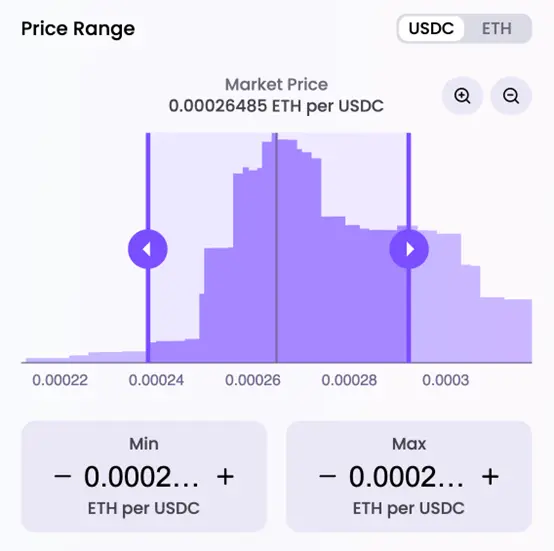
- Define the price range for which the user wishes to provide liquidity. You can choose to set a specific range or select liquidity supply for all price ranges.
Please note that if the market price exceeds the user's specified range, the position will convert to a single asset and stop generating fees.
- Click "Approve" to authorize the user's tokens for liquidity provision. This step involves gas fees and requires confirmation through the wallet.
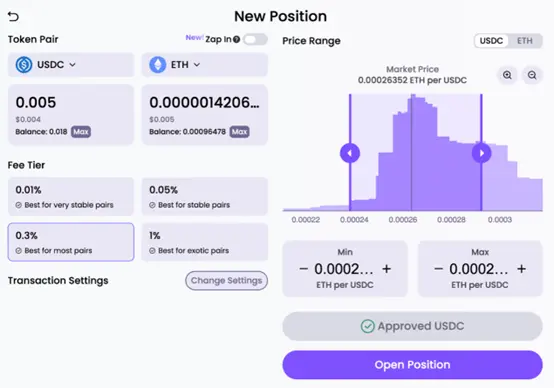
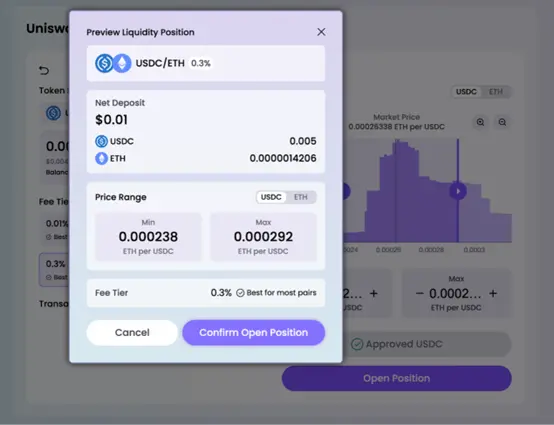
- After reviewing the liquidity position details, select "Open Position" in the wallet, then choose "Confirm Open Position." This action will incur network fees.
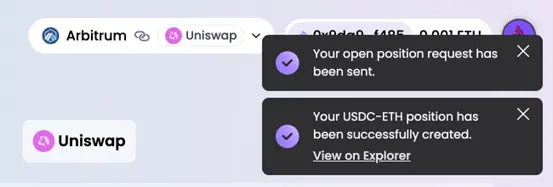
- The user will receive a notification confirming the successful execution of the transaction.
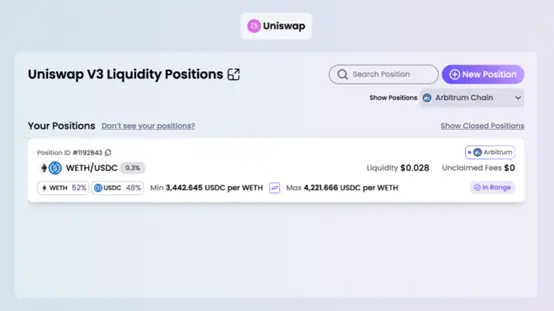
- The user's liquidity position is now active and can be viewed or managed at any time through the Aperture liquidity management interface.
3. Position Rebalance in Aperture
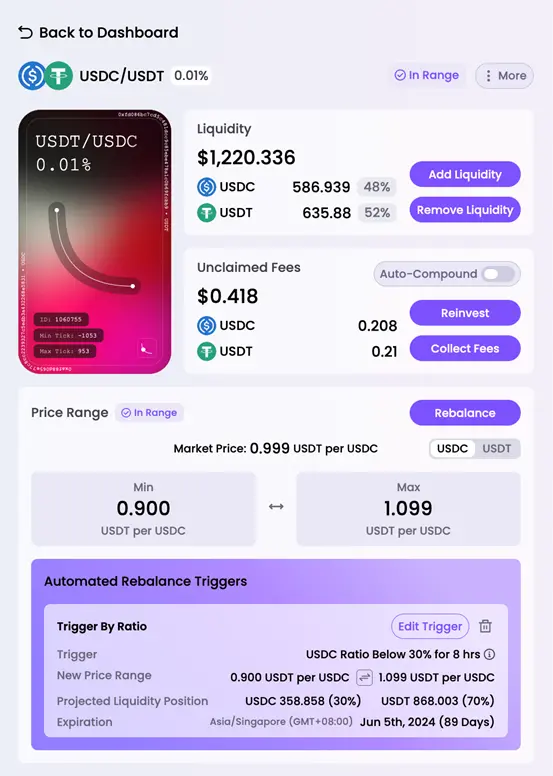
Users can execute instant position rebalancing based on pricing, pool ratios, and time or set up rebalance triggers, and can also choose a time buffer for triggers based on pricing or ratios. Aperture simplifies the rebalancing process by integrating liquidity extraction, calculation, swapping, and redepositing into one step, ensuring efficiency and eliminating the issuance of leftover tokens.
Instant Position Rebalance
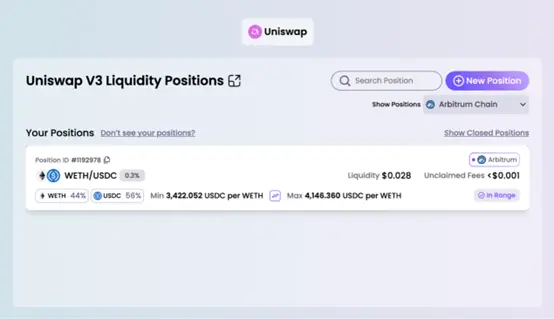
- On the "Liquidity Management" page, select the position (NFT) you wish to set for rebalancing.
- Click "Rebalance" in the details displayed for the position ID.
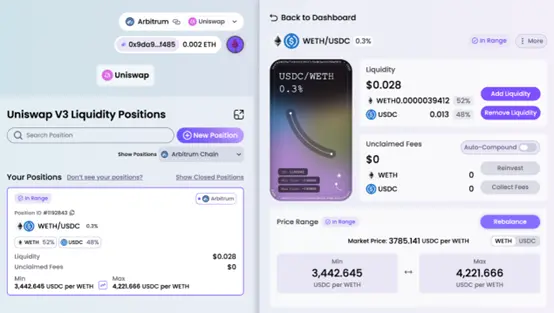
- Choose the desired asset ratio and price point range for the new liquidity position.
For Ticks, users can switch between any assets (similar to the Uniswap frontend).
Aperture will display the expected liquidity after rebalancing in the "Expected Liquidity Position" section.
Triggers will automatically expire after 90 days.
Set a gas limit by selecting the maximum gas the user is willing to pay in terms of position percentage or dollar amount.
Note: If the input is in dollars, Aperture will convert it to a percentage of the position amount, which is the basis for the trigger.
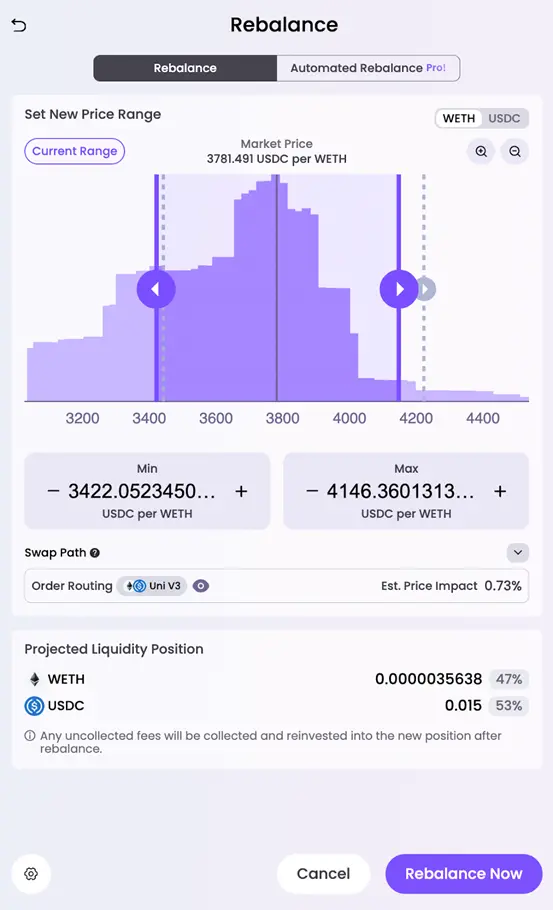
Click "Instant Rebalance" to enable.
Aperture will require the user to sign an off-chain message to allow its smart contract to rebalance their position based on the parameters selected by the user. However, if the user has already enabled Aperture as an authorized operator, this process is not necessary.
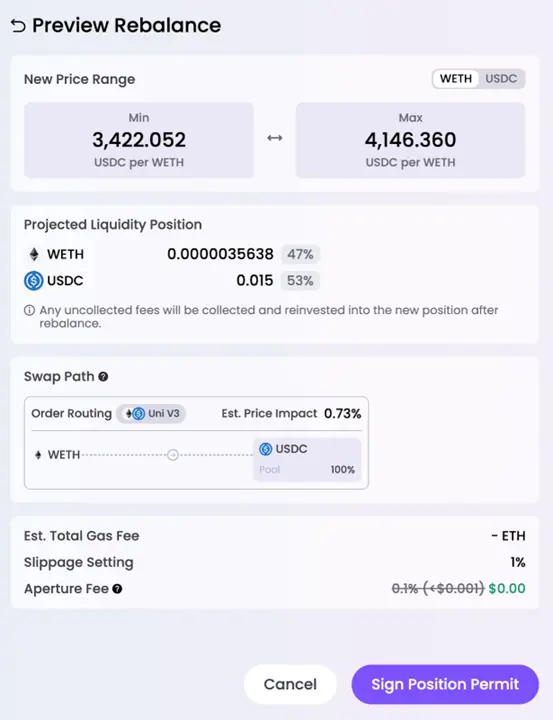
- After confirming the position permission, click "Confirm Rebalance."
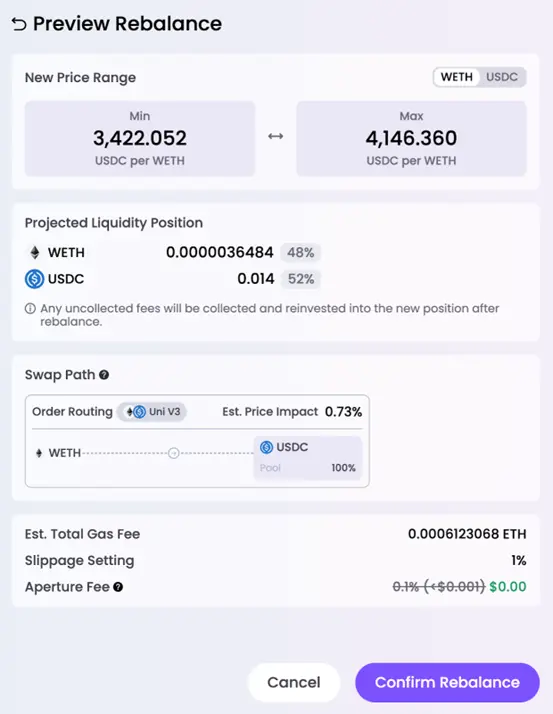
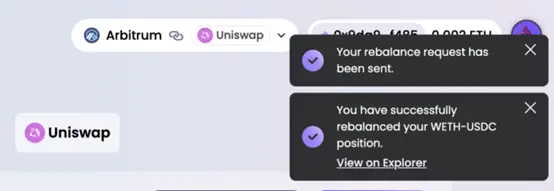
- After the transaction is successful, the user can see a pop-up notification and view the swap details on the blockchain explorer by clicking "View on Explorer."
Scheduled Position Rebalance
This guide outlines the steps for setting up position rebalancing for user LPs using Aperture's advanced tools.
- Switch to the LP position the user wishes to set for rebalancing.
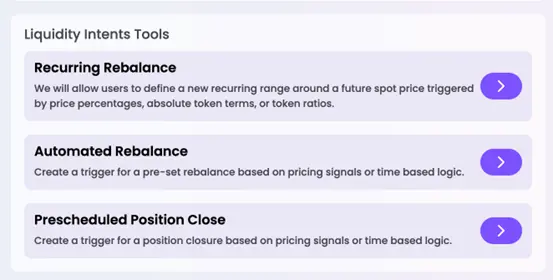
- Under the liquidity intent tool, select "Automated Rebalance."
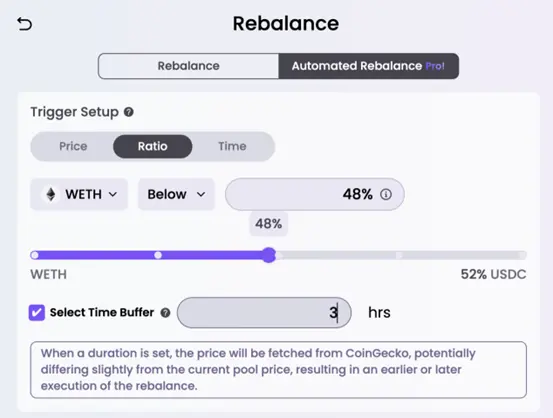
- In the "Trigger Setup" section, define the criteria for automatic rebalancing based on asset prices, pool ratios, or specific time ranges. Up to three triggers can be established for comprehensive automated rebalancing.
Additionally, users can implement a time buffer for triggers, requiring conditions to be met for a predetermined duration before initiating the rebalance, such as: ETH price remaining above 2000 for 6 hours or longer, or pool composition reaching 80% USDC for 6 hours or longer.
- After triggering the rebalance, choose the desired asset ratio and price point range for the new liquidity position.
For Ticks, users can switch between any assets (similar to the Uniswap frontend).
Aperture will display the expected liquidity after rebalancing in the "Expected Liquidity Position" section.
Triggers will automatically expire after 90 days.
Set a gas limit by selecting the maximum gas the user is willing to pay in terms of position percentage or dollar amount.
Note: If the input is in dollars, Aperture will convert it to a percentage of the position amount, which is the basis for the trigger.
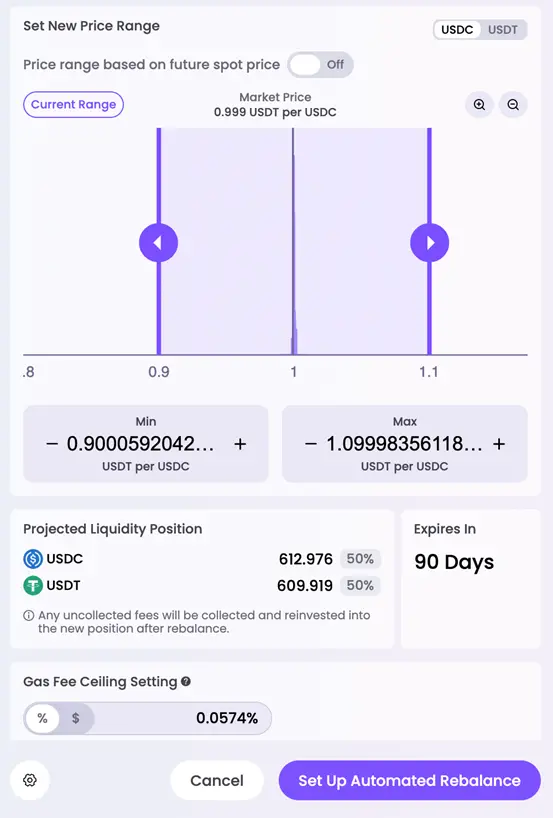
- After entering all necessary details, click "Set Up Automated Rebalance" to continue. Review the rebalancing intent details, then click "Sign Position Permit" and confirm the signature in the wallet to complete the process.
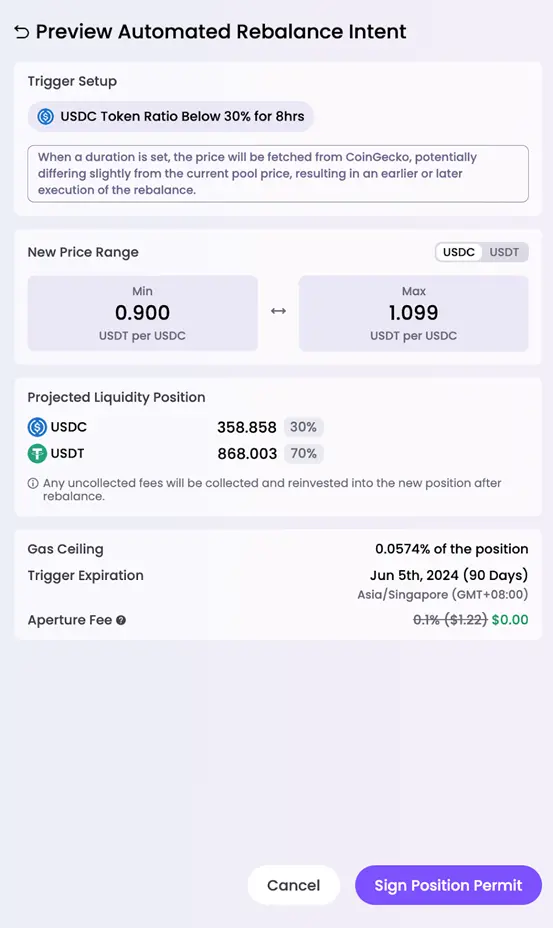
- The user has now successfully set a one-time authorization for their USDC-USDT position. Click "Confirm Automated Rebalance Intent" to enable the scheduled position rebalance.
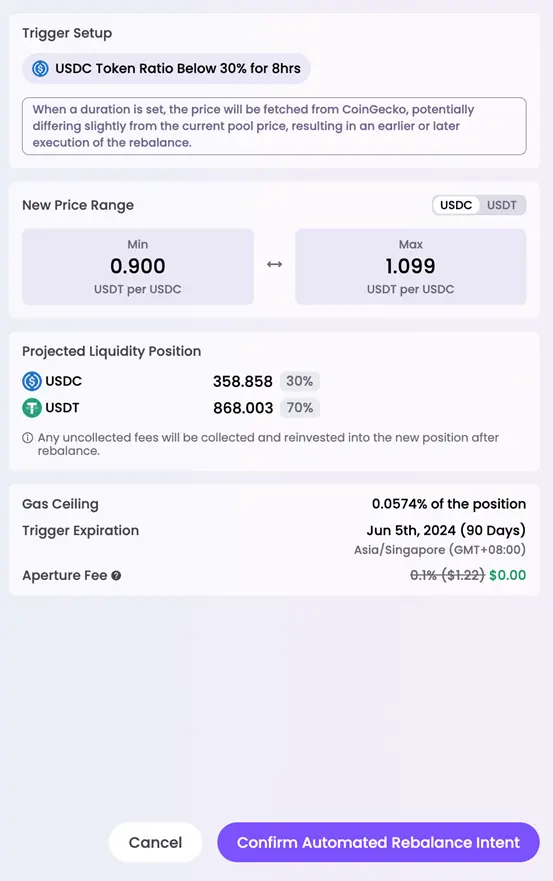
The user has successfully established a scheduled position rebalance. The "Automated Rebalance Trigger" will now be displayed in their LP position ID. If the user needs to cancel or modify the rebalance, they can do so by clicking the "delete" icon next to the scheduled rebalance or editing the trigger conditions.
