Lava network test node feeding tutorial
Author: S17_龙小羽, S17Labs
# Introduction
Lava is a network protocol that utilizes Cosmos technology to support flexible and scalable RPC by connecting applications to multiple node runners simultaneously. Outsource your node information to a top-tier vendor network from Web3.
Official website: Lava (lavanet.xyz)
Lava has secured seed funding from PayPal, Jump Crypto, and others. The project is still in the early testing phase, and you can set up a test node for initial trials.
Preparation Work
This article is a purely technical document and may seem a bit dry, so please be prepared.
(1) Environment Setup
Server requirements:
4GB of RAM
4-core CPU
100GB of hard disk storage
Server operating system: Ubuntu 18 or higher Linux server
Server location: United States
(2) Wallet and Faucet
Since the wallet needs to be generated via the command line, this will be done in the following steps.
# Setting Up a Test Node
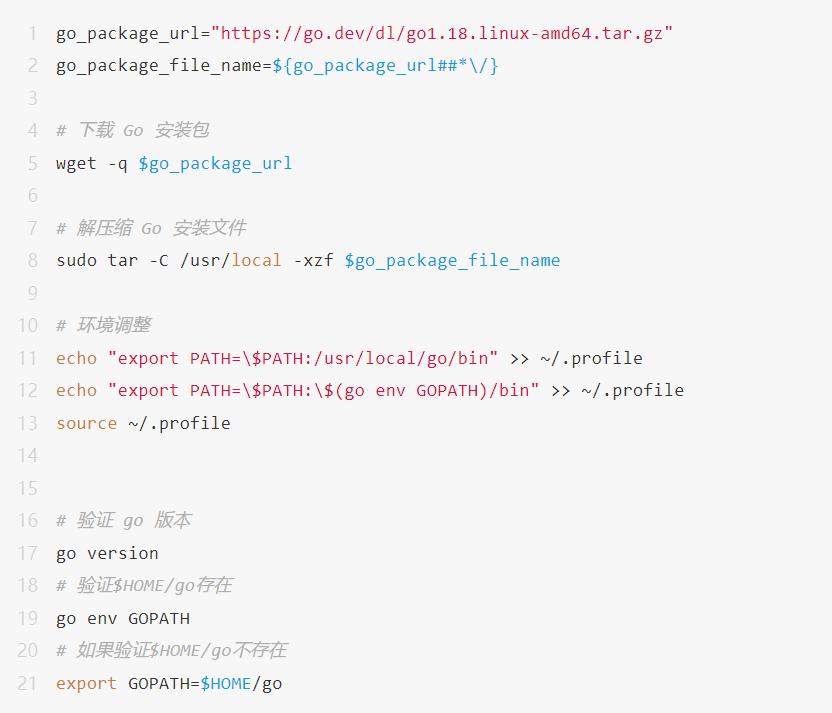
(1) Install Dependency Environment

Install Go Language
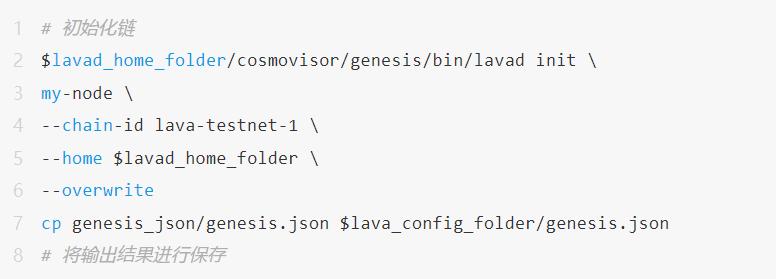
(2) Create a Local Node
Download the configuration file

Set the application configuration by copying the default configuration file of lavad to the config Lava configuration folder

Set the genesis file

(3) Join Lava Testnet
Install Cosmovisor to automate the upgrade process
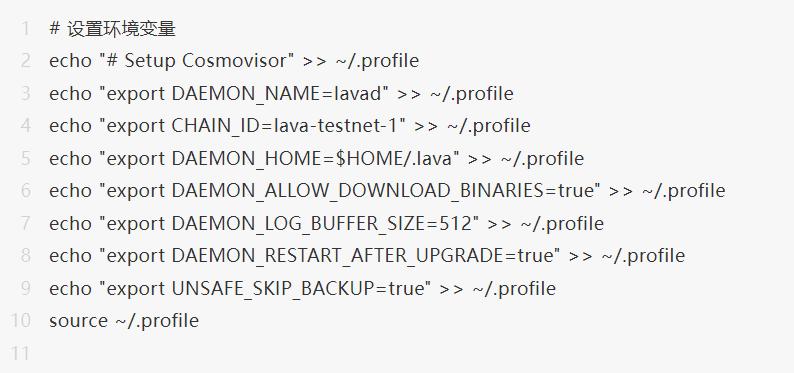
Set Up Cosmovisor


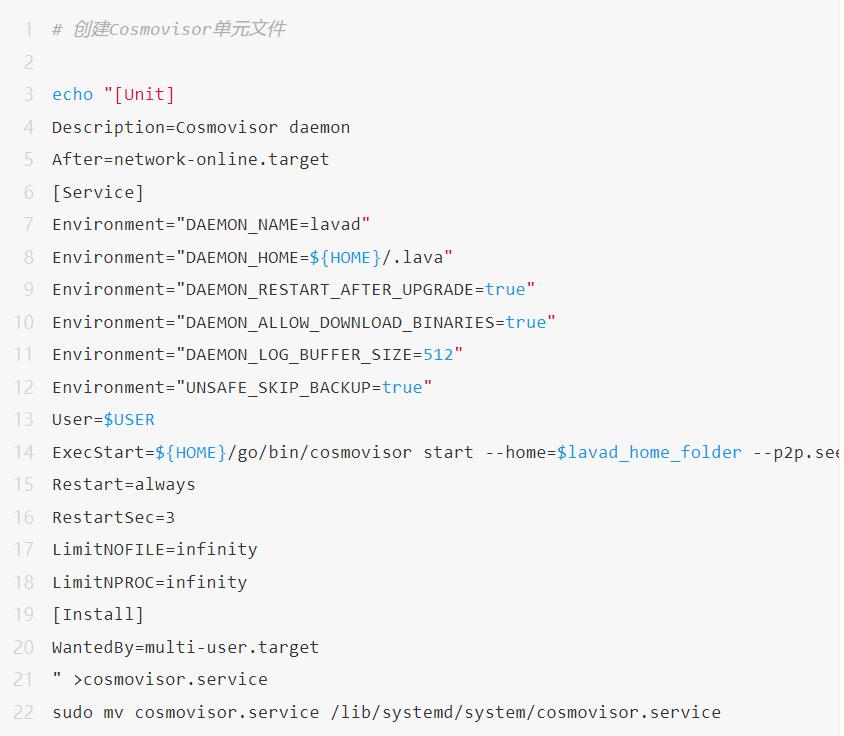
Create systemd Unit File
Download the Latest Lava Data Snapshot (Optional) ------ Not provided by the official team yet
Enable and Start Cosmovisor Service
Configure the Cosmovisor service to run at startup and start it

(4) Verification
Verify the Cosmovisor setup
Check the status of the Cosmovisor service to ensure it is running:

Verify Node Status
- Note that the location of lavad now exists under the Cosmovisor path:

# Create Wallet and Obtain Test Tokens
Create a new wallet

To ensure your wallet is saved in your keyring, look for KEY_NAME in your key list

The last thing to do before initializing the validator is to obtain your validator public key, which is created when you first initialize the node. To get your validator public key:

Use Discord Faucet to Obtain Testnet LAVA
Join dc https://discord.gg/5VcqgwMmkA
# Stake Validator Node
Once your account has funds, you can run this program to stake and start validating.

Confirm that your account has received tokens for staking
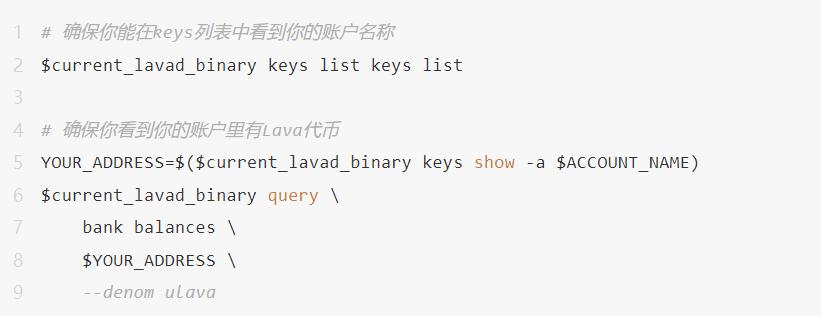
Ensure there are tokens in the account

Staking Validation
Here is an example with a starting value of 90000ulava. Replace <<moniker_node>> with a human-readable name of your choice for the validator.

After setup, you can check your wallet address on the official block explorer to see your staking node
Lava Block Explorer: https://bd.lavanet.xyz/

# System Maintenance and Monitoring
Each time you re-enter the system, you need to set the environment variables

This concludes today's tutorial on setting up a Lava network test node. If you have any questions or need to communicate, please leave a message in the background.


