Superfluid User Guide: How to Set Up Your Flow Payments?
Source: Rabbithole Blog
Compiled by: Dong Yiming, Chain Catcher
What is Superfluid?
Superfluid is a composable DeFi streaming payment project that allows users to transfer tokens from one address to another over a specified period. Its use cases include but are not limited to:
- Paying for subscriptions on a per-second basis instead of monthly/yearly
- Receiving/paying salaries in a more granular manner
- Earning profits in seconds while holding a certain token
On which networks can Superfluid be used?
Superfluid is currently only available on XDai and Polygon, which are sidechains that support EVM smart contracts and are very similar to Ethereum. This means you can use familiar tools like Metamask to approve transactions, and the transaction fees on these networks are much lower than those on the Ethereum mainnet.
In this tutorial, I will show you how to use Superfluid, and this task will be performed on the Polygon network.
How to set up your streaming payment on Superfluid:
What you need:
- A web3 wallet
- Some Matic in your wallet on the Polygon network
- (Optional) Any other ERC20 tokens: if you want to stream tokens other than Matic
(Here we assume you are already familiar with using wallets).
Once you meet the conditions listed above, we can dive deeper.
Step 1: Go to the SuperFluid page and connect your wallet
You can access the Superfluid page via this link: ++https://app.superfluid.finance/++
Select the wallet client you want to use (the page may take some time to load depending on network conditions). We need to be a bit patient at this point. If it takes more than a few minutes to load, I found that switching to another network and then back to Polygon can help the page load completely.
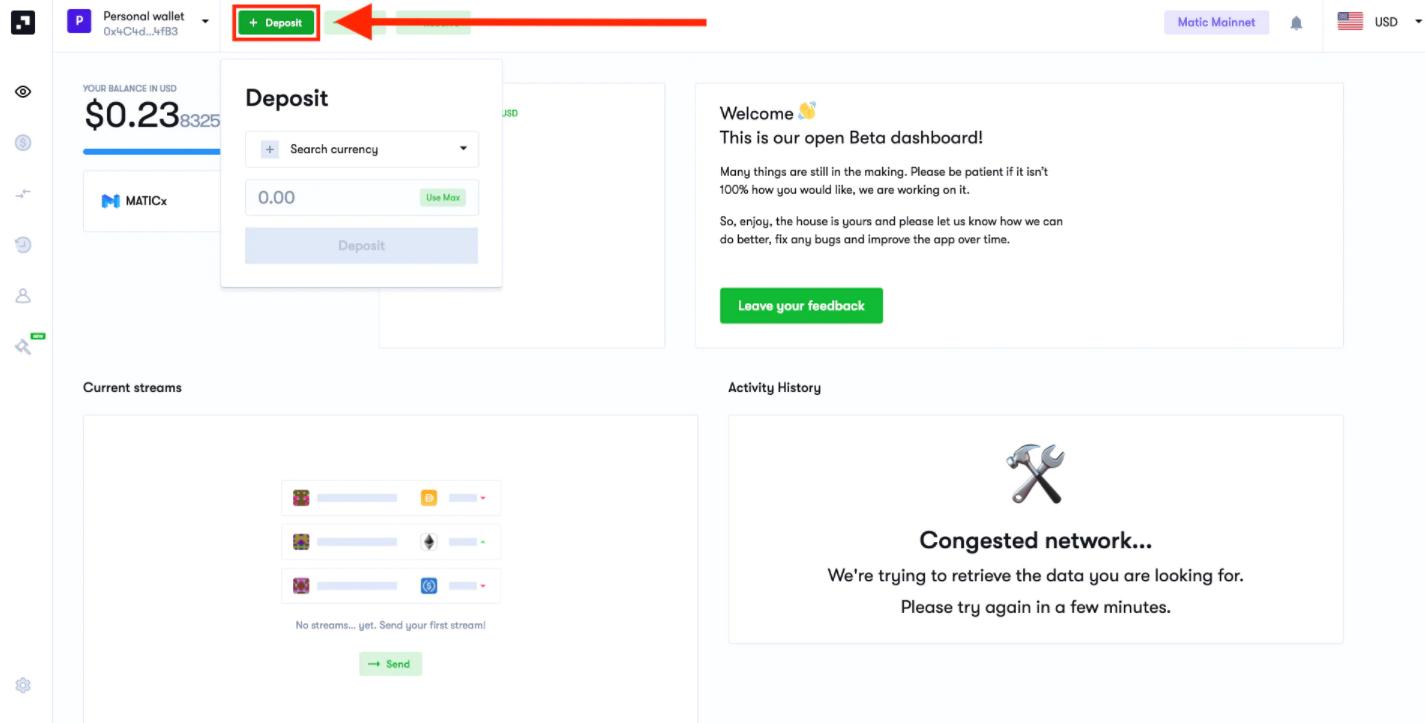
Step 2: Click the "Deposit" button at the top of the screen, a small window will pop up
You will first need to deposit some assets into Superfluid to open a streaming payment.
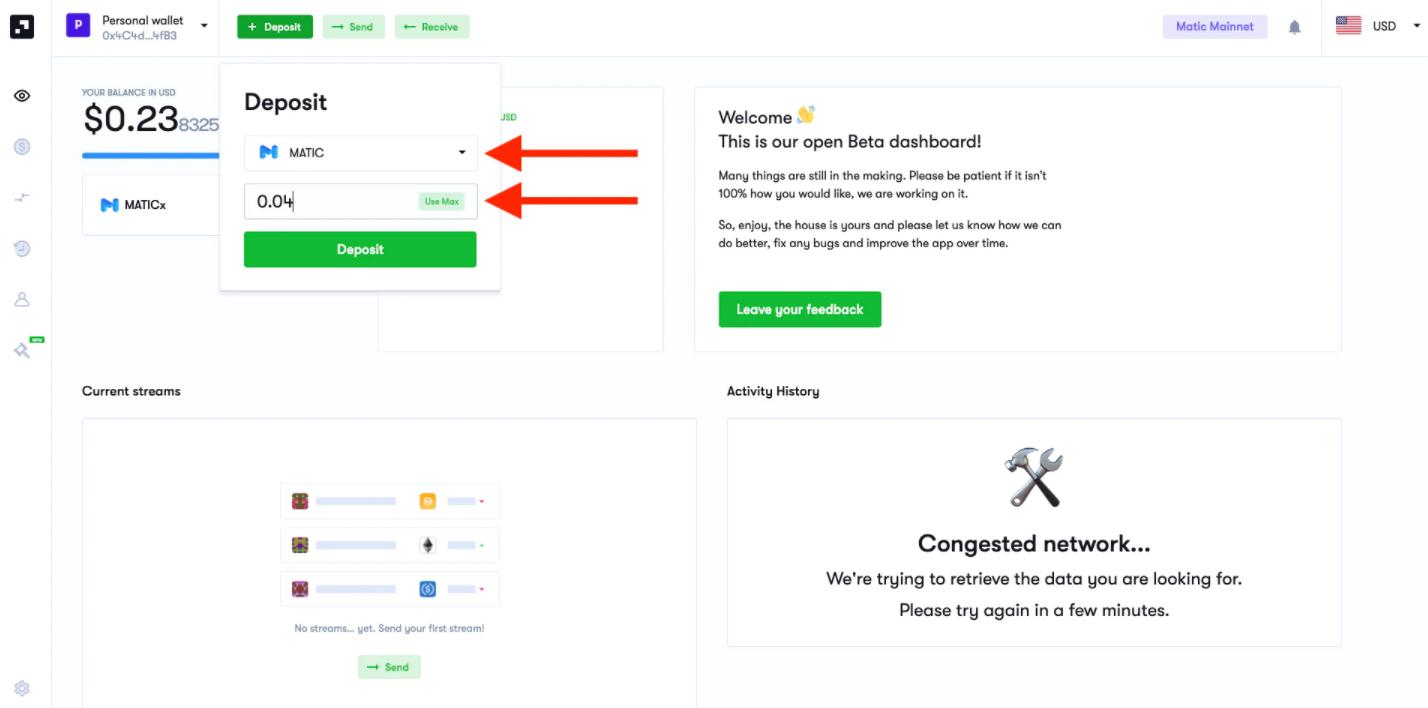
Step 3: Search and select the asset to deposit, enter the amount, and click "Deposit"
A window will pop up for you to approve the transaction. Typically, you can execute the transaction by paying just 1 GWEI as gas fee.
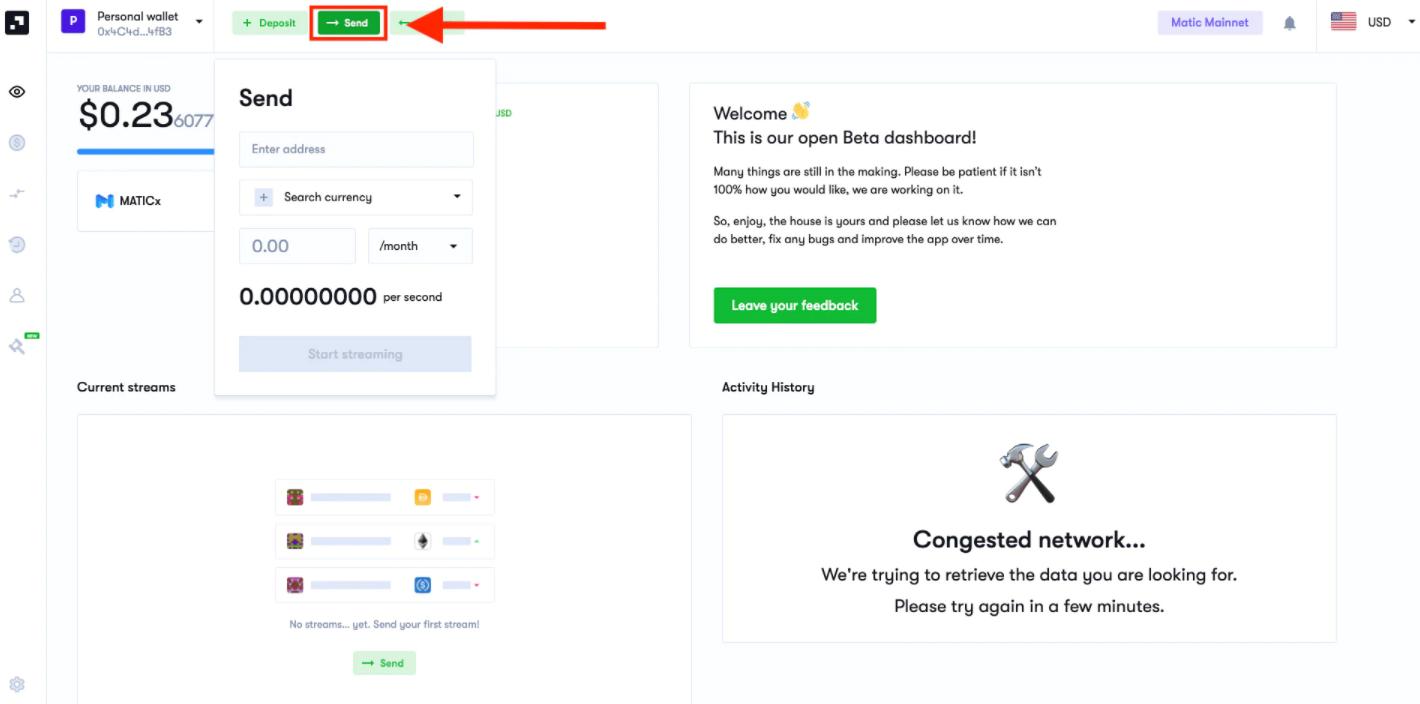
Step 4: Click the "Send" button at the top of the screen, a smaller window will pop up
Now that you have some tokens deposited, you can start your streaming payment by clicking "Send."
Step 5: Enter the details.
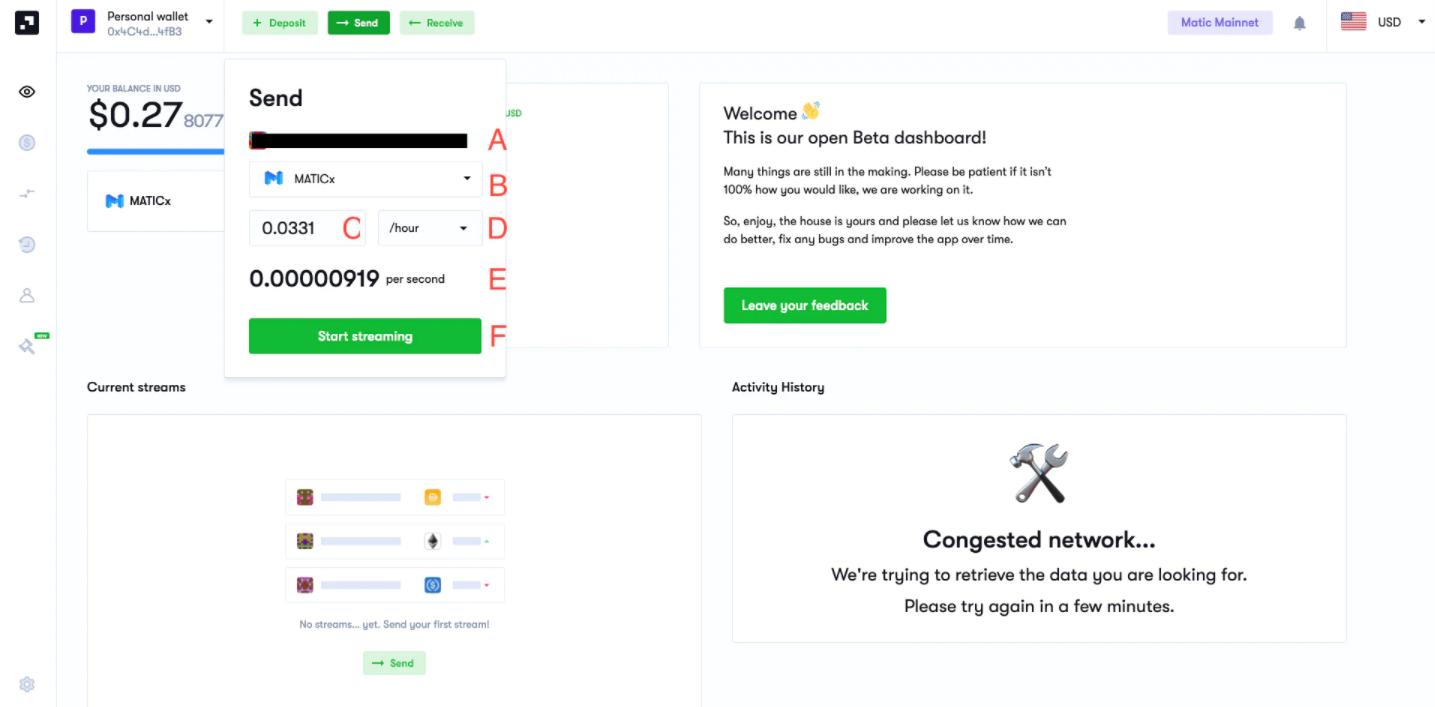
You need to fill in the following questions to complete the setup of the streaming payment:
A. Destination address
B. The asset you want to send
C. The amount you want to send
D. The time interval at which you want it to be sent
Options include monthly, weekly, hourly, and one-time (same as a regular transfer). Here, I chose one hour, which means I will send 0.0331 Matic to the destination every hour (at a rate of 0.00000919 Matic per second).
E. Once all the information is set up as you want, you can click "Start Streaming Payment."
It’s worth mentioning that if the platform believes your balance will be exhausted within the next 4 hours, the page will not allow you to start the streaming payment, so you need to make appropriate calculations.
Step 6: Monitor your streaming payment
Once the streaming payment you set up has started flowing in or out, your account's outflow will be displayed in the "Current Streaming Payments" section (any inflow will also be displayed if you have any).
Of course, the platform will also calculate when your account balance will be completely exhausted. It is important to keep a close eye on this, and I will explain why later.

If you click on the streaming payment you just started, you will see more details about it.
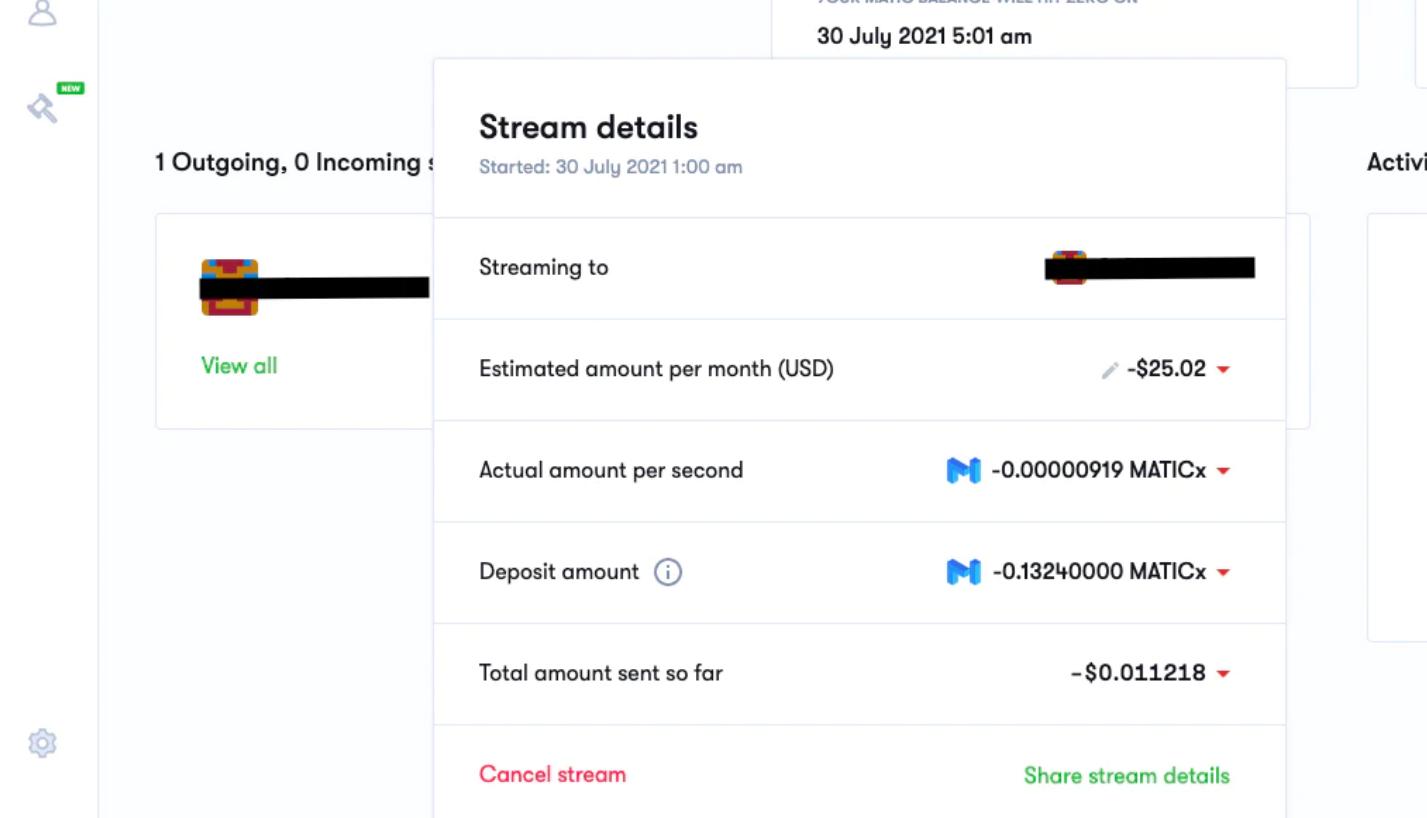
By clicking the pencil icon next to the "Estimated Monthly Amount" value, you can adjust your streaming payment amount and payment frequency settings.

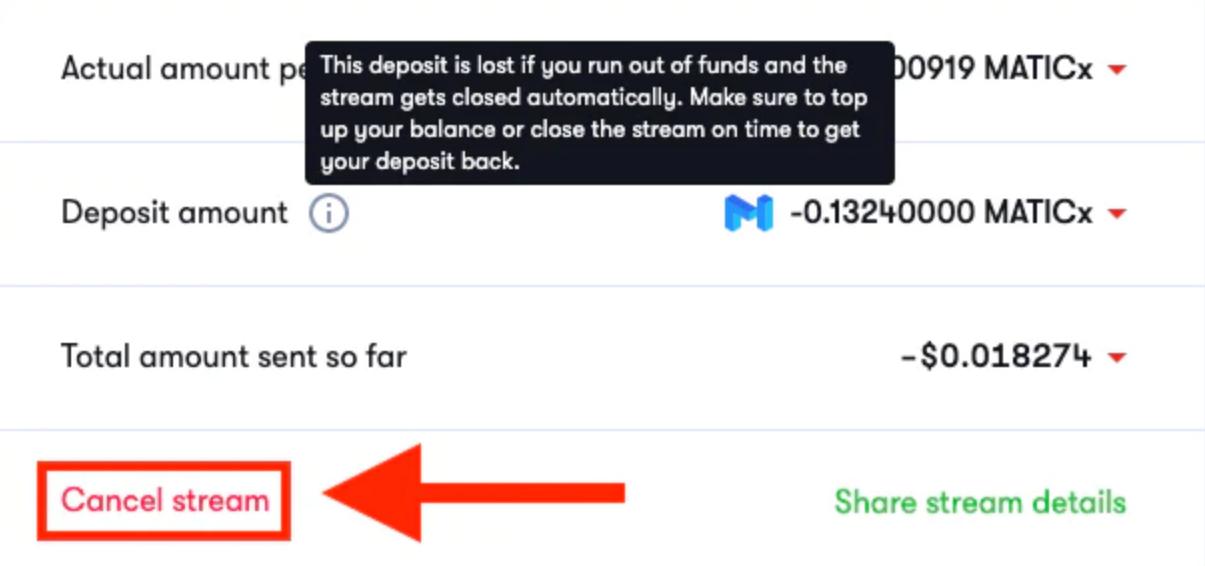
Most importantly, you will notice that you need to have a certain amount as collateral.
If you exhaust all the funds in your account, your streaming payment will automatically stop, and your collateral will be deducted. So make sure you have sufficient funds to complete the streaming payment you set up.
To close the streaming payment, you just need to click "Cancel Streaming Payment."
